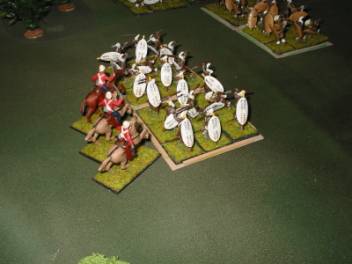
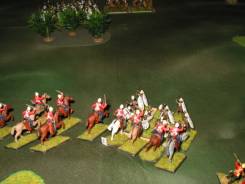
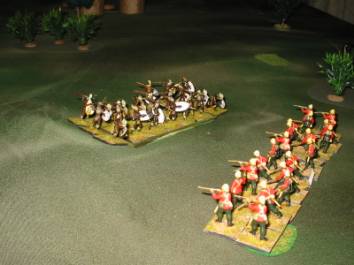
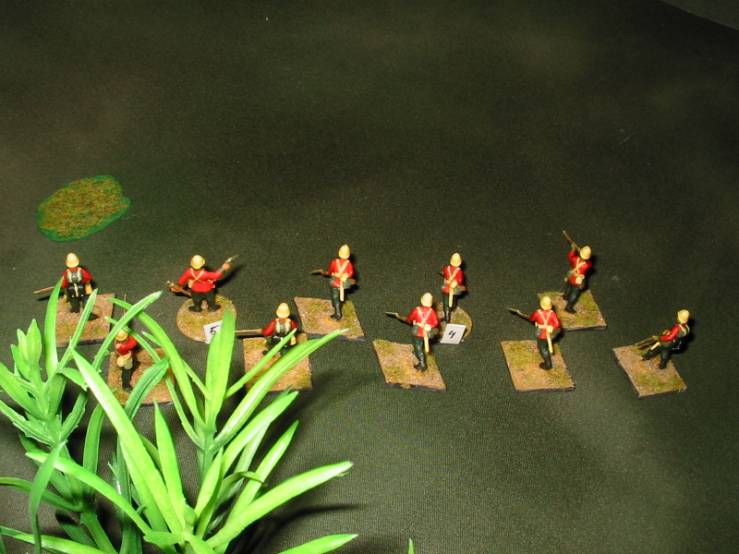
Rules used are Colonial Adventures by Two Hour Wargames, all figures are 1/72 scale ESCI Plastics ( British soldiers of the Zulu war, Zulu Warriors, and the cavalry are heavily modified 'Scots Greys').
I decided to play a patrol scenario, which requires me to check (enter or get within 12 inches of) the center of areas 1-6 and also expose all the Possible Enemy Force (PEF) markers, there may also be enemy units hidden in the woods. Once having determined the extent of the N’Gulu menace, if any, disperse it. This game was played solo with me running the British and the rules the N'Gulu, many if not all of the THW rules are designed for play solo or same side with 2-3 small charts determining, what, where and how the enemy appears and acts. The rules come with many army lists including one for the Zulu, but I have found that with their high REP and ferociousness they kick ass then eviscerate their opponents bodies (my understanding is it was a sign of respect, freeing their trapped spirits to the next world) and rather than modifying the Zulu, I would create a foe that could more accurately represented by the figures.
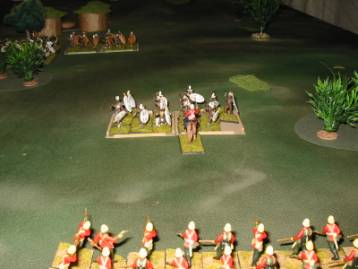
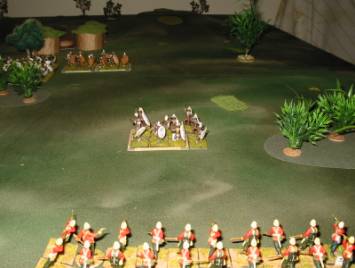
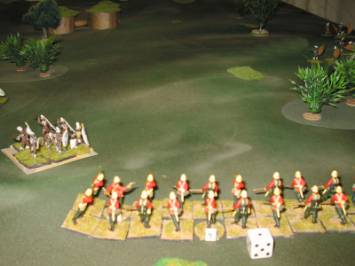
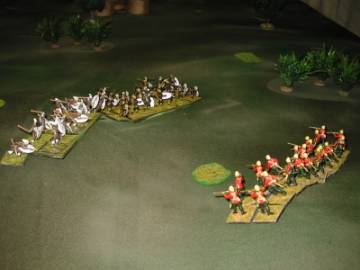
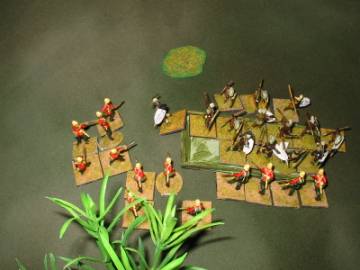
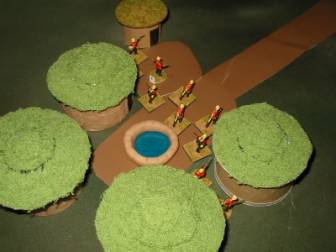
It doesn't show very well in this picture (below) but, there are hills in areas 1, 3, 7, 8 and 9 and PEF’s in areas 1, 4 and 5 (Big White Dice). The British enter bottom of the photos in to areas 7-9. The table is 8' x 4'.
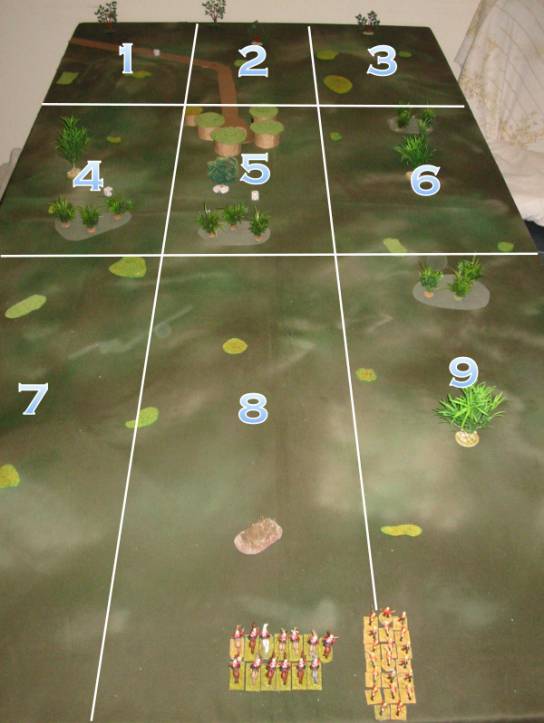
The British force consist of one platoon (20 figures) of REP 4 infantry with a REP 5 Lt., a REP 5 SGT. and a Cpl. that is a dangerous REP3, accompanying them is an oversized REP 4 cavalry squadron of 13 figures with a REP 4 LT and a REP 5 NCO. (In Colonial Adventures standard size for a cavalry squadron is 15 figures, but my units were constructed initially for "The Sword and the Flame" which has them at 12 figures, and it makes them brittle in Colonial Adventures.)
For those unfamiliar with Two Hour Wargames line of rules, each turn each side rolls 1d6 and the side that rolls highest goes first, but may only move units that have a REP equal to or higher than the roll of their die, you can "win" activation but not be able to do anything (example: you a roll a 6 but have no units with a REP of 6, therefore cannot actually activate anybody) after you have activated all the units you want to (or are able to) your opponent then activates any units of his that are equal to or higher than HIS activation die roll, but it is not your Standard UGOIGO turn, as you finishing activating a unit it can sometimes force an enemy unit into a reaction, which can then prompt you into reacting to its reaction.
There are two types of die rolling: PASSING DICE during which 2-4 dice are rolled, then each die is compared to the a unit's REPutation and any roll equal to or less is considered a pass, though a unit may roll more than two dice, only the two lowest count. Passing dice are rolled when the unit is taking a crisis (morale) test. The other type of rolling is SUCCESS DICE, that involves rolling 1 to 10 dice and rolling equal to or less than a success number, which varies if your shooting or meleeing and is used only during combat resolution.
Start:
The
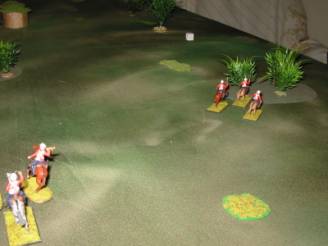
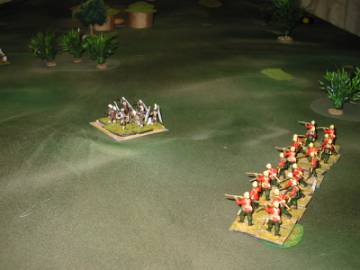
British get a free activation to enter, the infantry move and get LOS on the first copse
of trees and know there is no one in it (they passed 0 on their scouting check,
so there COULD be someone there but they can’t check it again until someone
actually moves into the terrain feature), the cavalry move onto the top of the central
hill and get LOS to the other 2 woods and scouting reveals they are empty.
Turn
1: N5, B3 (The numbers to the left mean N'Gulu rolled a 5 for activation the
British a 3. The N'Gulu activate first) No N’Gulu on the board except PEF but they are all REP 1 (due
to bad
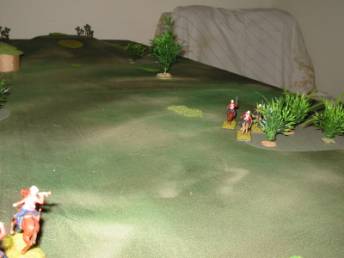
rolls), therefore move only when the N'Gulu roll a 1 for activation. The British infantry advance and get LOS on the PEF in area 5 but
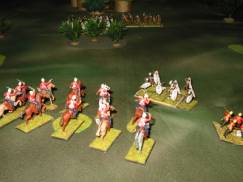
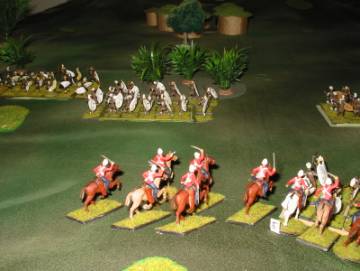
its just nerves, then the British cavalry send 3 scouts to check out the woods on
the right, and determine it is indeed empty
Turn 2: B3, N2:
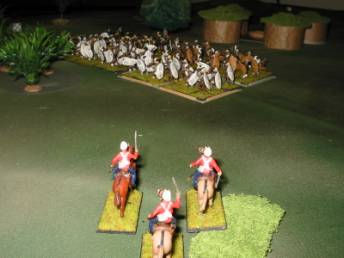
The cavalry scouts move on and check the center of area 6 and its
clear, so they move left and check the center of area 5 (when a unit
comes within 12" of the center of an area it makes a die roll, on a 1 a PEF
is placed in the center of the area and is immediately resolved, if it is a unit
it represents a unit or group of units that were hidden, Enemy To
Front!
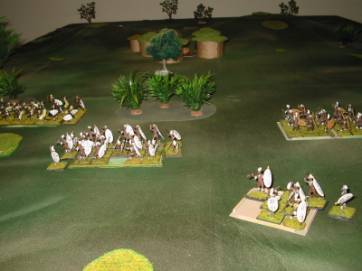
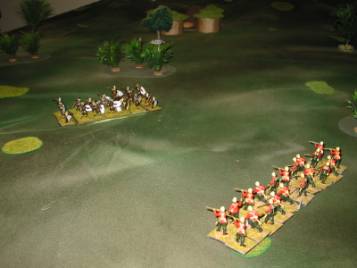
more die rolls and it’s a "Main Body" twice our size (so 4 units). More rolls
determine their unit sizes, REP, and leader quality; 2 units of 21 figs with REP 3 leaders (bad
luck for them those units
must
use their leaders REP for activation purposes)
must
use their leaders REP for activation purposes)
and 2 with 18 figures with REP 4 leaders, more die rolls result in none of the
leaders being medicine men or the C-in-C.
Since
an enemy unit ended its turn within 12" the nearest N'Gulu unit must take a “Test of Wills”
Crisis check, it rolls and
passes with 2 dice, as it is others (units are either armed with ranged weapons
or not) it wants to charge. Any unit that wants to charge must take a “Want to charge”
test the N'Gulu rolls and passes with 2
dice, so charges forward, stopping 3” from the scouts who then take a
“Being charged” test and they pass 2, being mounted they must counter charge
and move forward 3” to meet the N’Gulu, each loses 1 figure on contact, then
each side rolls their melee dice (N’Gulu 9 dice, 4 for REP, +1 special bonus,
+1 shielded +1 throwing spears +2 for 3:1, Brits 5 Dice 4 for REP +1 mounted)
melee ensues the British kill 1 more N’Gulu (net losses 2 for the N'Gulu 1 for
the British) Since both units took casualties both side take a crisis test for "received
casualties" the N’Gulu pass 2 and so do the British (I made a mistake here, the
British were
out numbered at least 2:1 and so treat Pass 2 as Pass 1 which means 1 figure
would run away, which would cause another Received casualty test, which at best
1 figure would runaway and they would be gone) I mistakenly treated a pass 2
as carry on and so the British stayed.
Turn
3: B3, N2: The British cavalry scouts break off melee and fall back 8”, which
requires N’Gulu to make a “test of wills” and they pass 2 which results in
them charging, they pass 2 and so charge, the British cavalry
scouts take a being charged test and pass 2 so they must counter charge again,
both side lose 1 figure on contact and both sides score an equal number of successes
in melee so no additional casualties, both sides then take a received casualty test; N’Gulu pass 1 and 4 figures run away they test again and pass 2
and are OK, the British test for receiving casualty and pass 2 but outnumbered
2:1 or more they lose a figure (technically he runs away), their last in the scouting unit. A nearby British infantry
has LOS to the running scout so they must take a “within 6 inches and sight of friendly running group” and they pass 2 dice so they are OK.
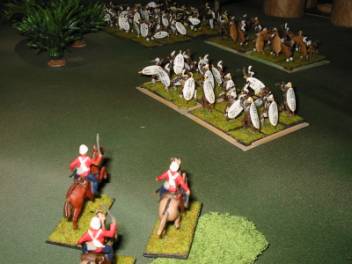
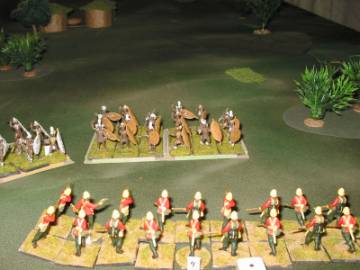
The
remnants of the cavalry squadron on the hill wheel to bring maximum firepower on
the N’Gulu and shoot and miss, but force the target to take a "received fire"
test on which they pass with 2 dice they score Charge! so they take a "want
to charge" test, pass with 2 dice and charge towards the unit that shot at
them stopping at 3", the cavalry take a "being charged"
test, they pass with 2 dice which results in a countercharge, saber and assegai clash on the slopes of the hill, both lose
the minimum 1 figure, both pass 2 on their "Received casualty" test and carry on.

Its
now the N’Gulus half of the turn and they burst from the woods, which causes a
“Test of wills” for the unengaged portion of the cavalry unit, it passes 2
and must charge. At this point the cavalry will be destroyed as both halves are
outnumbered 2:1 and can at best only pass 1 which will cause minimum of 1
casualty which will bring on another casualty test and the same result will
apply until there are no British left in either half, the British infantry check
for seeing “friend within 6 inches and sight runaway” and pass 2.
Turn 5: N3, B1. Two N’Gulu units move trying to flank the British, another one wheels in place and the N’Gulu directly in front of them charges, a volley blasts into them killing 4 they test for casualties and Pass 1 (which was surprising since volley fire reduces targets REP by 1 per kill, so zero REP, but I treated a die roll of 1 as a pass) which resulted in 4 figures running away which caused another received casualty test, when all were done the entire unit had Run Away! Which caused a “friends within 6 inches and sight” test on a nearby N’Gulu unit which fortunately was not outnumbered by the runners (by 1 figure), and so with a pass 2 carry on. In their half of the turn the British infantry line wheels to the left and pours a volley into the other nearby unit of N’Gulu, killing 2 of them and the N’Gulu pass 0 on the “received casualty” test and they Run away!
Turn
6: N1, B1. In most Two Hour Wargames
rules a tie on the activation roll results in nothing happening, though it can
sometimes generate Re-enforcements or special events. But for this game I had
none of those.
Turn
7: N4, B1
Turn
8: N3, B1. The nearest N’Gulu charges, the British get another volley off no
hits but which results in the charge stopping. The next N’Gulu crests the hill
and forces a "test of wills" on the British who rush their shot but manage to kill
1 and encourage 6 more to flee (pass 0, then pass 2 on received casualty
tests).
The
British then activate move rearward and fire another volley into the N’Gulu on
the hill, which prompts them into charging, another volley flays them dropping
one but they keep on coming. Melee ensues, both lose 1 figure, then roll for more, the
British kill another 1 both take their “received casualty” tests and pass 2
but the N’Gulu are outnumbered 2:1 (17 to 8 actually) they will eventually
run away, because a pass 2 converts to pass 1 which results in more casualties (in the form of run aways) forcing another test and so on, I
place them all in the "dead or fled" pile. The last N’Gulu sees their "friends
within 6 inches run away" so they test, Pass 2 and are OK.
Turn
9: N3, B3. Nothing happens on ties.
Turn
10: N6, B3. N’Gulu have no REP 6 or higher units so they cannot do anything.
The British move backwards again and fire another volley killing 1 more and
scaring 3 more away.
Turn
11: N6, B4, N’Gulu have still have no REP 6 or higher units so again can do
nothing. The British move back yet
again on to a hill, and fire yet another volley, killing none, but prompting the
N’Gulu into charging. The British
get off a hasty volley, the N’Gulu make contact and a melee ensues, the British
quickly bend in the unengaged flank which fires into the N’Gulu flank for
several turns eventually getting stuck in.
Turn
20: B3, N1. The melee which has raged for 9 turns finally ends, there are 13
British "Out of the Fight" (they are not actually dead yet, they
are merely combat ineffective). The last PEF moves, towards nearest cover, which is the
Krall
Turn
21: B4, N3. The British spend this
turn recovering stretcher bearers, shirkers and lightly wounded and now numbers
10 figures. In Colonial Adventures when a European unit starts its activation
more than 12” from any enemy unit and moves no closer to any enemy, it can recover
up to half of its “Out of the fights” (the other half go in to the Dead
or Fled pile) which represent some soldiers helping their
buddies and lightly wounded being cajoled back into the ranks.
Turns:
23-37 The British move forward
through the Kraal, get LOS on the last PEF which has managed to move once the
entire game, and reveal it as nothing, then moves on and check the centers of area
1, 2 and 3, which are also clear. They have successfully patrolled their assigned
sector.
Post game activities
As this was a one off
game there is no need to do post game actions but I did anyway in case I wish to
use it as a start to a campaign, and to demonstrate how easy it would be to run
a small campaign.
The British infantry roll for replacements and recover all their losses both Out of the fight and run aways and are once again at full Strength. The cavalry also roll and make good their losses, though most of their losses were from run aways.
I arbitrarily set the
British Major morale at 4 and the N’Gulu at 6 (since they are a long
established and large kingdom). The British Major Morale goes up by one to 5 and
the N’Gulu goes down by one to 5, both roll on the "Major Morale
table" and each pass 2, which tells me if there was to be a next scenario
it would be another patrol. Since the British won the scenario they get to roll
on the “New Arrivals” table and pass 2 dice, so would add another unit to
their Order of Battle, which is determined by a recruiting roll on the British army list.
N’Gulu Army List
|
Unit Type |
Recruiting
Roll |
Class |
REP |
Open |
Mob |
Notes |
|
Royal Warriors |
2 |
Melee |
5 |
12" |
12" |
+ 1d6 in melee,
throwing spears, Ferocious |
|
Elite Warriors |
3-4 |
Melee |
5 |
12" |
12" |
+ 1d6 in melee,
throwing spears, (1) medicine man |
|
Veteran
Warriors |
5-7 |
Melee |
4 |
12" |
12" |
+ 1d6 in melee,
throwing spears, (1-2) medicine man |
|
Untested
Warriors |
8-9 |
Melee |
3 |
NA |
12" |
+ 1d6 in melee,
throwing spears, (1-3) medicine man |
|
Rifle armed
Warriors |
10 |
Ranged |
4 |
12" |
12" |
10 Figure unit,
musket armed |
|
Mounted
Spearmen |
11 |
Melee |
4 |
24" |
24" |
Throwing
spears |
|
Mounted
Spearmen |
12
(1-5) |
Melee |
5 |
24" |
24" |
Throwing
spears |
|
Artillery |
12
(6) |
Ranged |
4 |
2-4" |
NA |
|
+ Medicine man makes the unit Ferocious as long as the Medicine man is part of the unit. There may be no more than 3 in play at any one time.
+ Throwing spears give a unit so armed an extra melee die if they make contact and are charging or counter charging.